For many organisations is it obvious to use HPE Greenlake SSO to authenticate their users for that service. From my personal experience I can tell that most of them require help somewhere in the process. There are plenty posts about using HPE Greenlake SSO with Azure like the one on the HPE Developer Blog:
Configuring Azure AD as the SAML IDP with HPE Greenlake Cloud Platform and Aruba Central | HPE Developer Portal
You also find an incredibly good blog post using Okta for HPE Greenlake SSO here:
Okta SSO Integration for Green Lake and Aruba Central – WIFI-GUYS
But despite those good stuff, there is no post about using Google Workspace for HPE Greenlake SSO. The following post will change this and show you how to use Google Workspace to login to HPE Greenlake and Aruba Central.
Google Workspace Preparation
HPE Greenlake require a special attribute during authentication. This is the “hpe_ccs_attribute” attribute. I describe the attribute in detail, later in this post.
First, let’s prepare Google Workspace to send this attribute during SAML authentication with HPE Greenlake. In your Google Workspace Admin Console go to “Directory–>Users” and select “More options”. In the drop-down select “Manage custom attributes”:

This will bring up a new screen with all available attributes:
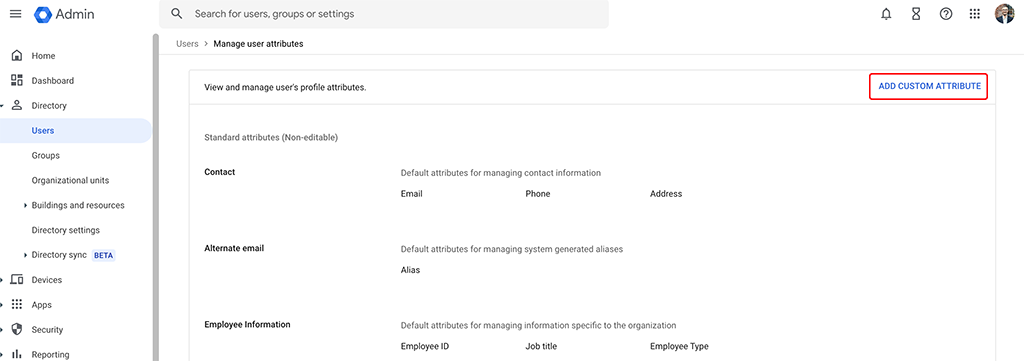
Find the “ADD CUSTOM ATTRIBUTE” link on the top right corner to create a new custom attribute:

You can simply copy the information from the screenshot above or use your own “Category” and “Description” but chose the “Custom fields” settings from the screenshot above.
Afterwards click the “ADD” button in the lower right corner to add the attribute to you Google Workspace attributes.
You can now fill this attribute with content. You need to do this for every single user. But before that, let’s talk about this attribute and how it looks like.
The “hpe_ccs_attribute”
The “hpe_ccs_attribute” is used to set the access privileges to a user. This includes the right to use HPE Greenlake. This also includes which application within HPE Greenlake the user can access. It also set the role of the user, within GLCP and all applications, the user can use.
The attribute itself is a long string and consists of multiple parts:

The first part is the “version”. This is currently “version_1”.
The second part is the HPE Greenlake Customer ID:
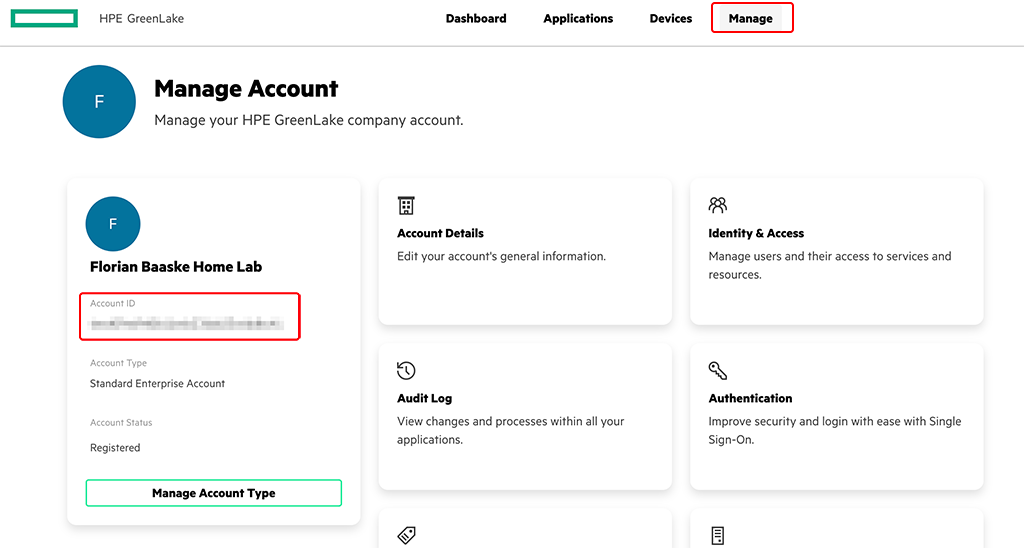
To get your GLCP “Account ID” go to login to GLCP and go to “Manage”.
Afterwards, you configure the applications for the user. The first one is always HPE Greenlake itself. The “app cid” is always “00000000-0000-0000-0000-000000000000”. This is followed by role of the user, within HPE Greenlake, e.g. “Account Administrator”, “Observer” or whatever role you have defined for that user.
After the role you can add the scope as well. It is either “ALL_SCOPES” or a user defined scope.
For Aruba Central, just repeat the steps from before and replace the “app cid” with the one from Aruba Central:
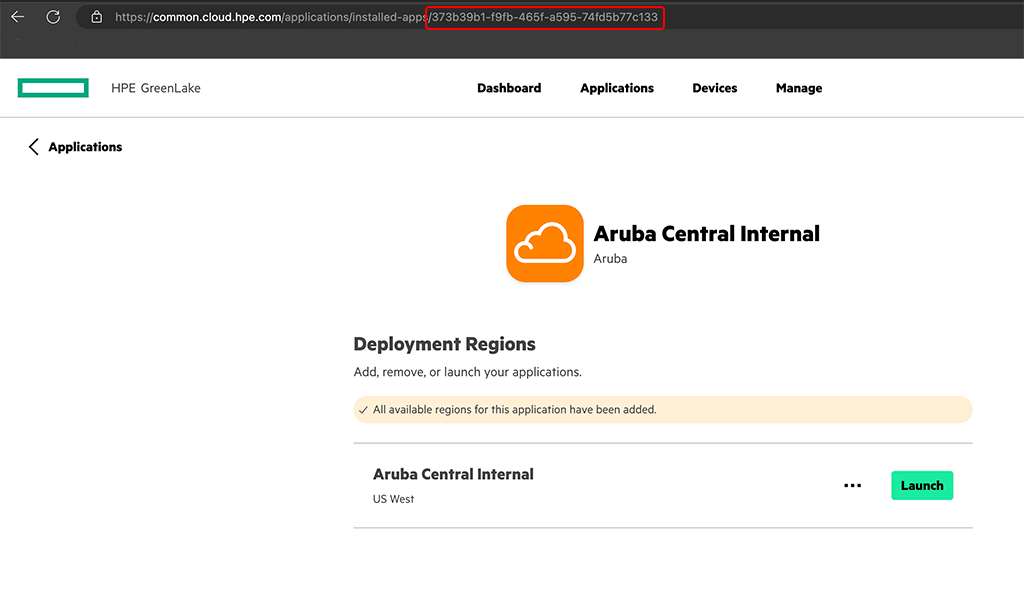
To get to that screen, login to HPE Greenlake and select “Application” and select the Aruba Central application. The “app cid” for Aruba Central will be one part of the URL.
Now add the role and the scope. Those can be different from the ones selected for the HPE Greenlake app.
Below is an example:
version_1#6ecd09a69d0b11edb22ada25c6ddbc41:00000000-0000-0000-0000-000000000000:Account Administrator:ALL_SCOPES:373b39b1-f9fb-465f-a595-74fd5b77c133:Aruba Central Administrator:ALL_SCOPESIf this is too complicated, you can use the “hpe_ccs_attribute” generator here:
Aruba Central + GreenLake SAML Generator – WIFI-GUYS
Now, let’s add this to the user in Google Workspace. For that, go back to your Google Workspace Admin Dashboard and go into the “Directory” and select “Users”:

Click on the user, to get to the details screen and select the “User Information” field. Look for the created attribute from above:
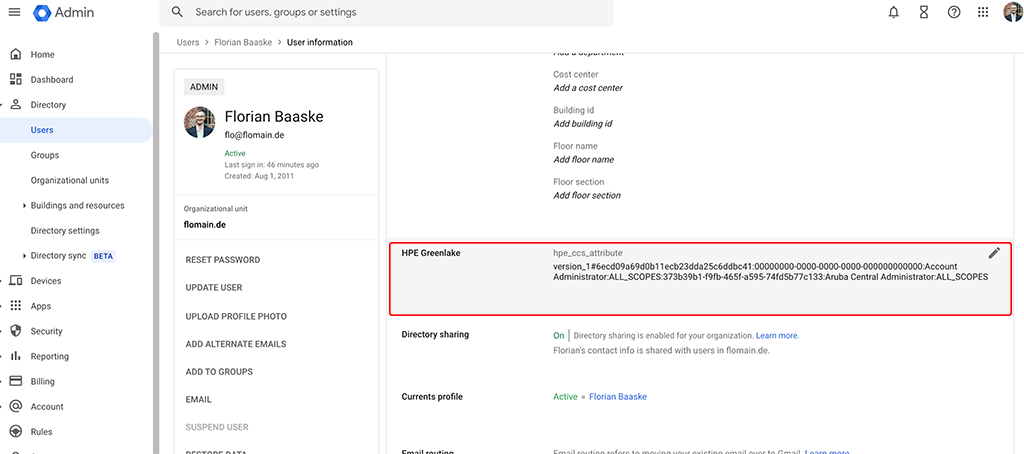
Simply copy the string from above to that field and save. The user is ready to authenticate to HPE Greenlake. You need to do this for all users which have access to HPE Greenlake and/or Aruba Central.
Create the SAML App for HPE Greenlake SSO
To use Google Workspace as an IdP for HPE Greenlake SSO you need to create a SAML App within Google Workspace.
To create a SAML App in Google Workspace login to the Workspace Admin Dashboard and got to “Apps–>Web and mobile apps” and click on “Add app” to select “Add custom SAML app”:
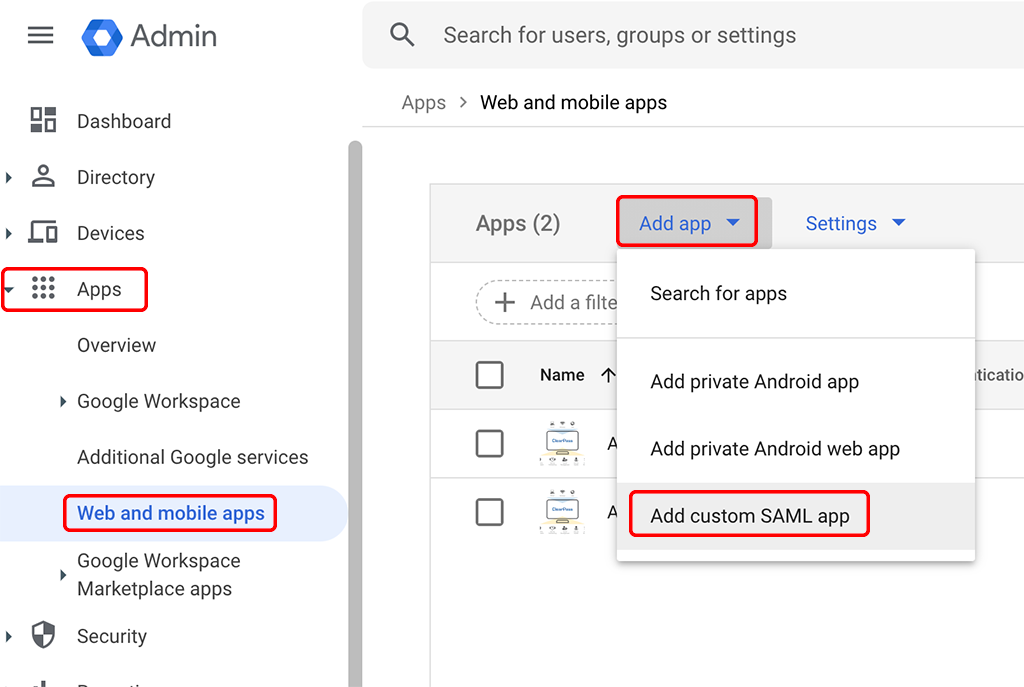
This opens a new screen and starts a wizard to create a custom SAML app. The first screen is the following:
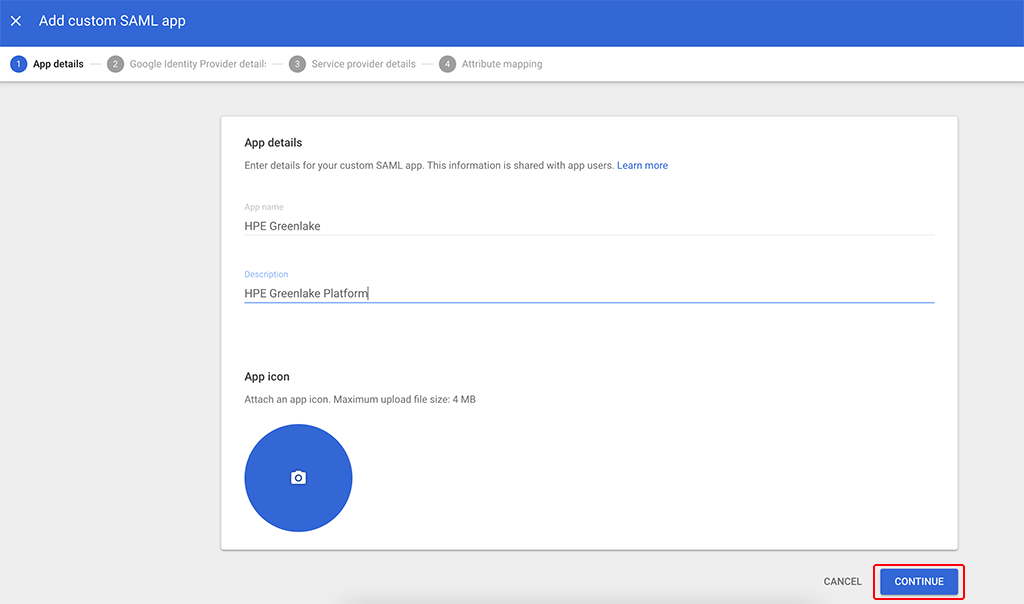
Enter an “App name” and a “Description”, so that it suits your needs and let you find the app easily. You can also add an “App icon”. Click “CONTINUE” and go to the next screen:

On this screen, simply download the metadata. The file will be used later in HPE Greenlake. Go to the next screen:
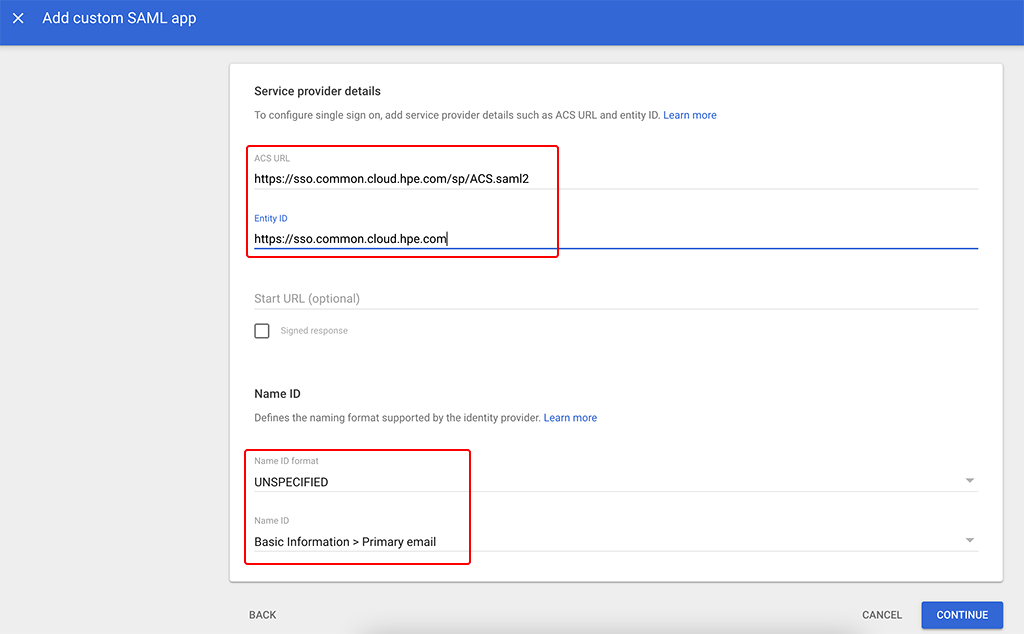
This screen requires the HPE Greenlake Information. You find them in the documentation, or you can use those from above:
ACS URL
https://sso.common.cloud.hpe.com/sp/ACS.saml2Entity ID
https://sso.common.cloud.hpe.comLeave the rest of the options as in the screenshot above.
Go to the next screen:
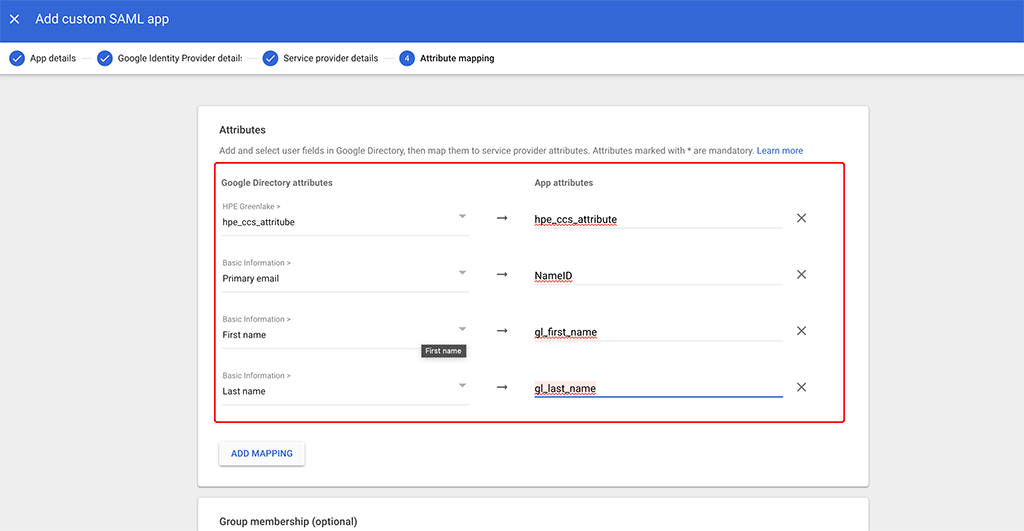
In the last screen add a new mapping to make the previously created “hpe_ccs_attribute” available for the SAML app and name it the same.
Add the rest of the mappings as shown above.
Group Memberships is not needed, as HPE Greenlake does not care about those and only use the “hpe_ccs_attribute” to assign user rights.
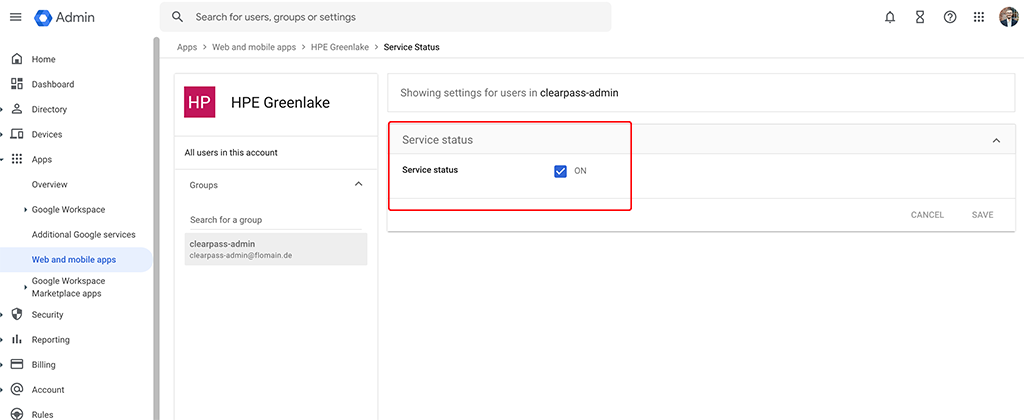
After you finished the wizard, you need to enable the app either for all users or only to specific user in a group, for example:
The summary screen for the app should like this:
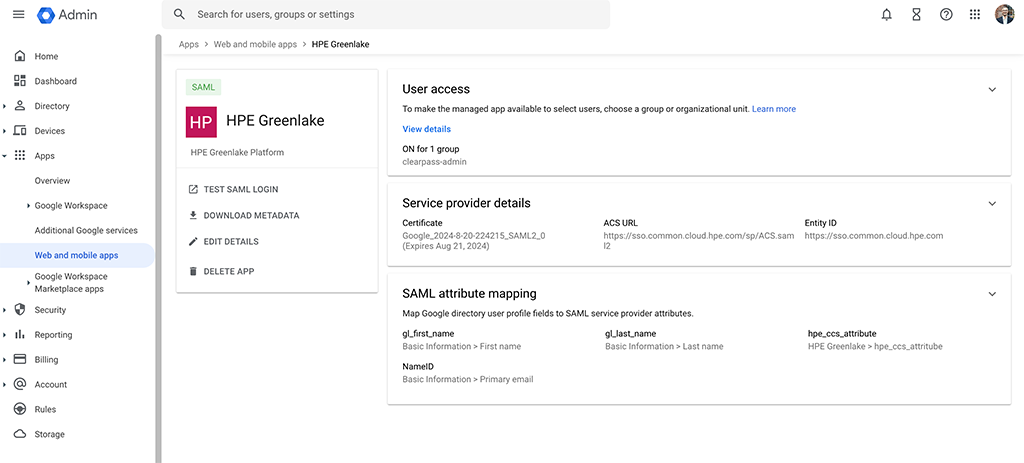
The Google Workspace part is now completed. Head over to HPE Greenlake to finish the configuration there.
Configure SSO in HPE Greenlake
The next steps should be same for most of the Identity Providers and are not Google Workspace related.
Login to your HPE Greenlake account and go to “Manage–>Authentication”:
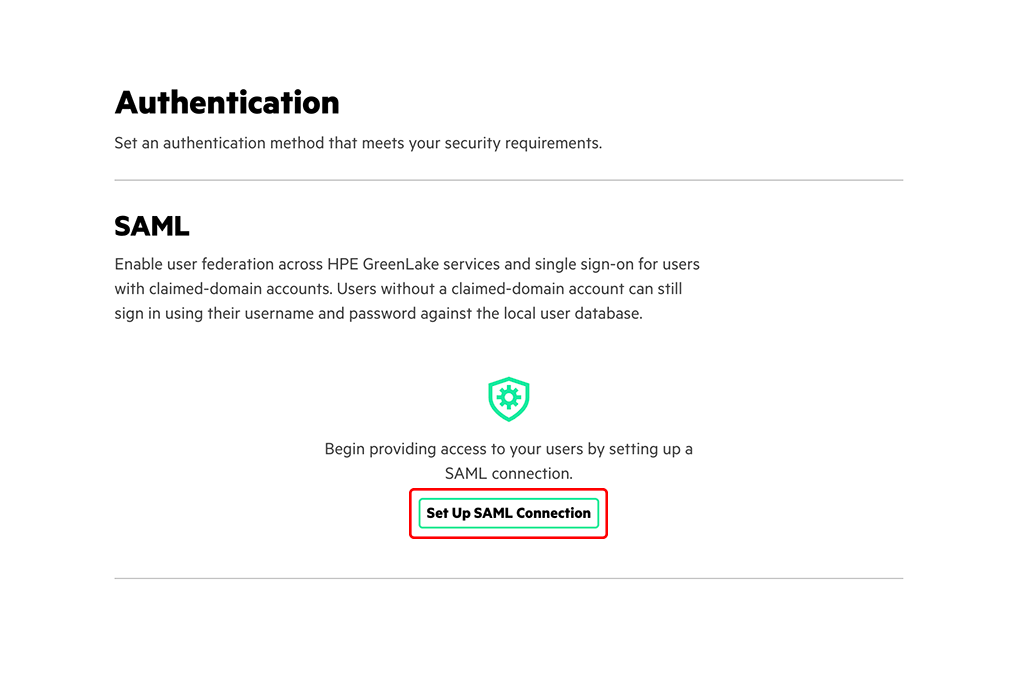
If this is the first domain, you add to HPE Greenlake, the screen looks like above. Click the “Set Up SAML Connection” button to start the wizard:
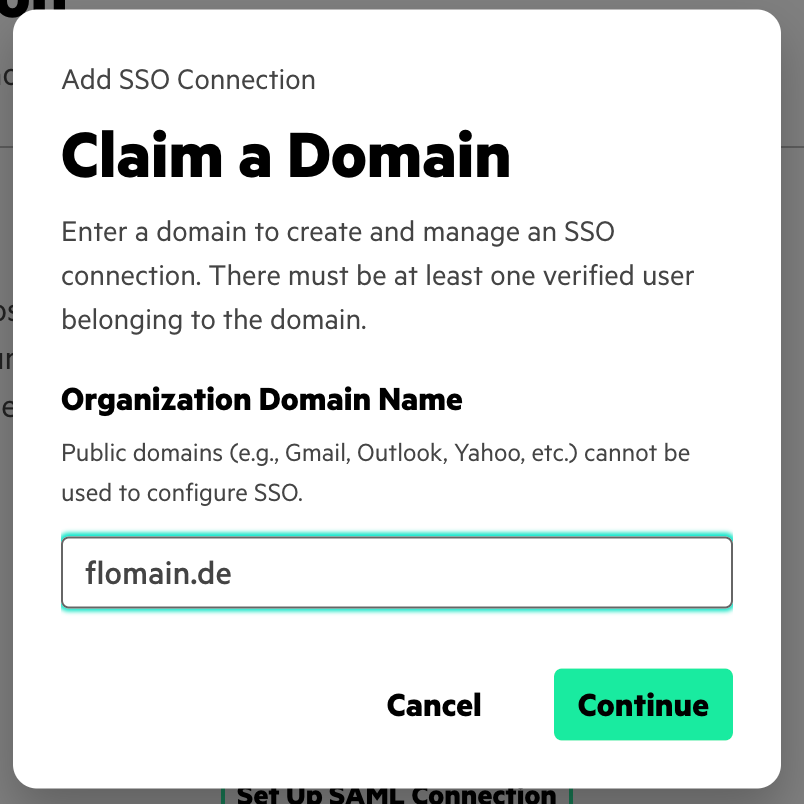
In the first screen enter your domain. This is the part of the mail address after the “@”. Click “Continue” to get to the next screen:
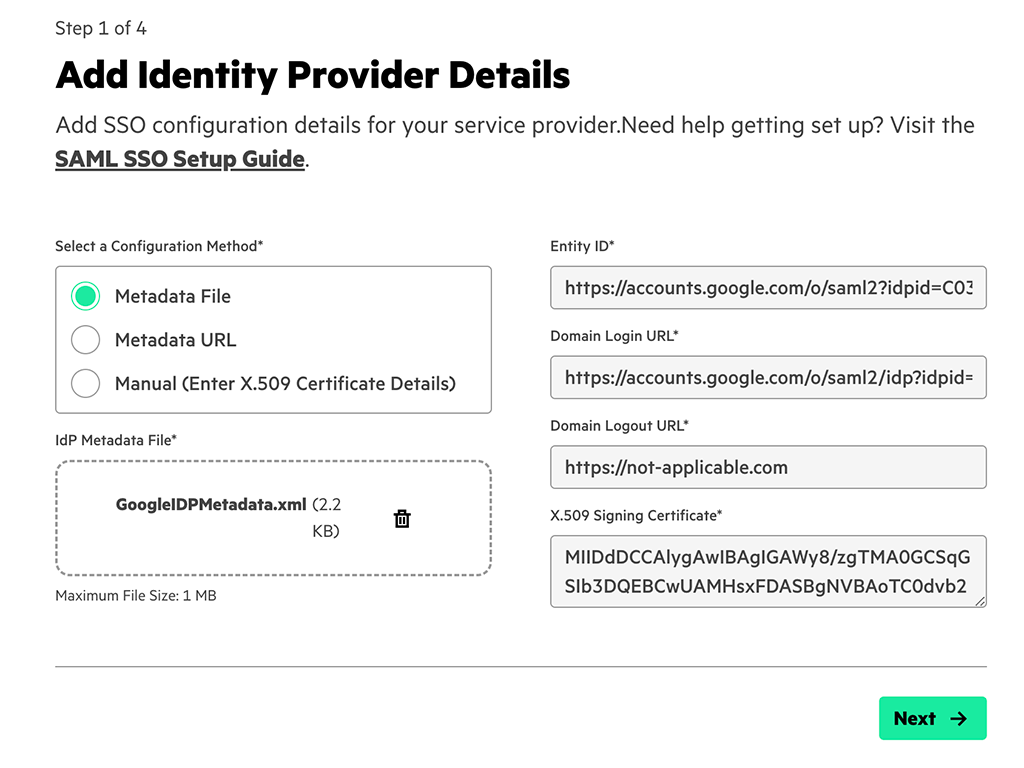
Still remember the file you downloaded while creating the Google SAML app? Now it the time to upload the file. This will autocomplete all the fields and you can click “Next”:
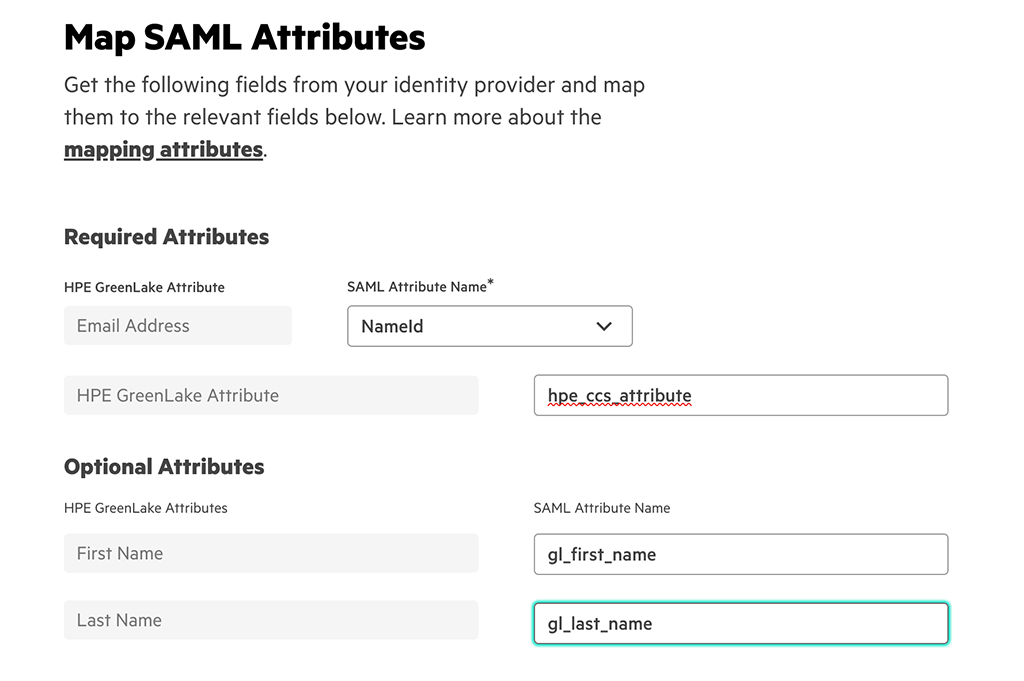
On this screen you map the attributes from Google Workspace to HPE Greenlake attributes. If you used the attribute naming from this post in your Google Workspace SAML app, you could leave everything as shown above.
Click “Next” and go to the next step:
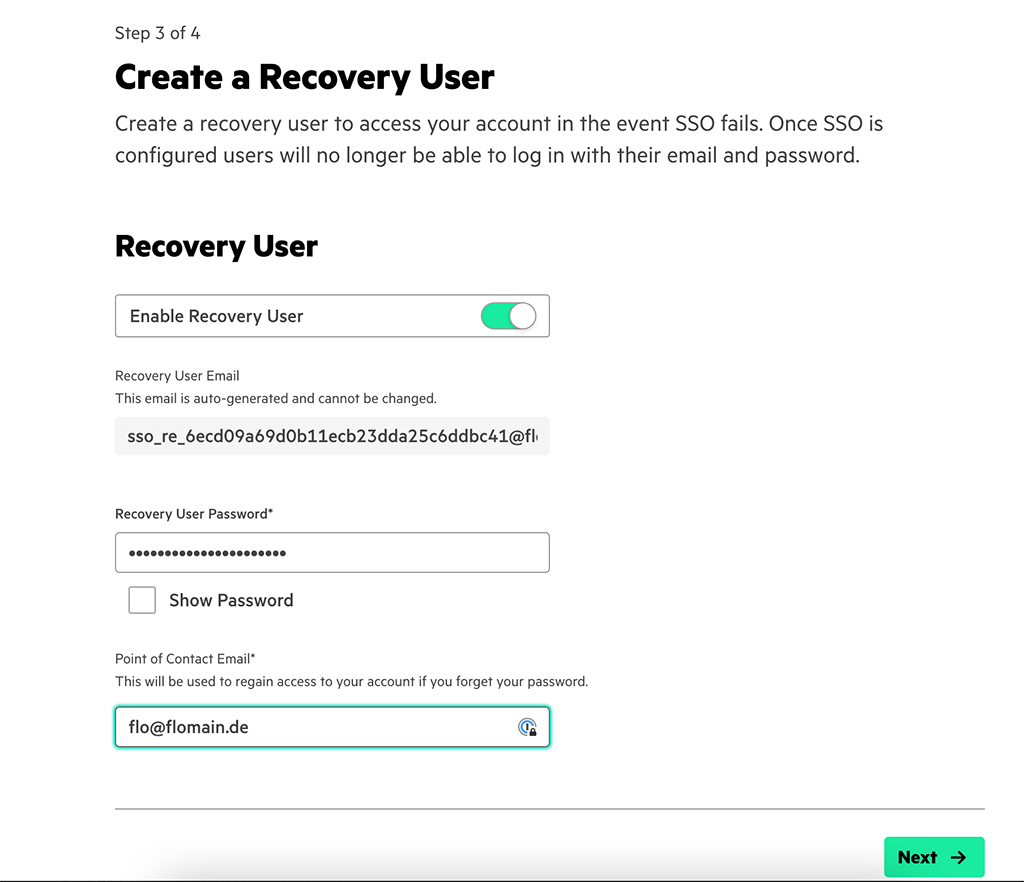
The system creates a recovery user for you. This user can login without using SSO. If ever something gets broken, this might help to rescue your account.
Click “Next” and go to the last page. Here you review all the settings, and you finally create the connection.
Afterwards, you can try the login. Go to the HPE Greenlake login page and select “Sign in with SSO” and go to the SSO login page. You can also try the link below to access this page directly:
After you enter your mail address and click “Next” you will see the login screen of your IdP, in our example Google Workspace. Afterwards you should have access to your account.
If you find this post useful, leave me a comment and share your feedback with me. You can also buy me Pizza, using the “Buy me a Pizza” button on the right, to support this blog and keep the IT gremlin happy.
If you would like to do me a favor, share this post with your friends and social media contacts. This would really help to make this blog more popular and help others to find the information above more easily using search engines.
Share on:
Great article. I tried following your steps, double checking I got everything right. But when I go to use the HP SSO I get a mesage that “Please Specify Target
No Single Sign-On Target Specified
The resource you’re attempting to access isn’t specified in the single sign-on request, and no default location exists. Please contact your system administrator.”
Any thoughts on what this could be?
Hi EP,
thanks for your comment.
I haven’t seen this error. Do you get this error after clicking “Next” on the Greenlake SSO login? If so, it could be, that you haven’t configured the SSO URL from Google Workspace?
Are you habe to use tools like SAML Tracer (Browser Plugin) to check whats going on?
It is hard to guess, without having the configuration.
BR
Florian