ClearPass Guest is one of the most used guest systems and makes it very easy to allow specific people or a group of people to create guest accounts. They can also maintain their own accounts. To allow this you need to configure the ClearPass Guest operator login.
The last post about operator login for ClearPass covered the login for the radius server part. This time it’s all about the guest part of ClearPass. And in contrast to the last post, this is more complex. The main reason for this is, that you will allow more people to access the system. They also have different objectives, but I will explain this later on.
ClearPass Guest Operator Login – Define Operator Profiles
The first step to get this done is to create different operator profiles for different user groups. This is the hard thinking part of this setup. In my lab, I have two different profiles.
- Super Administrator
- BYOD Operator
The Super Administrator has all the power to do everything. But not all people in the organization can resist such a big power, so I give them only to the network admins. All other people get the BYOD Operator profile. This profile allows them to manage devices they onboard. This assumes you allow device onboarding for people within your organization.
You can also allow your users to create and manage guest accounts. Simply add another profile or modify an existing one. You can do everything if have the Super Administrator power, what you want. The process stays the same as in the following paragraphs.
To create or modify the operator profiles login to ClearPass Guest and go to “Administration–>Operator Logins–>Profiles”:
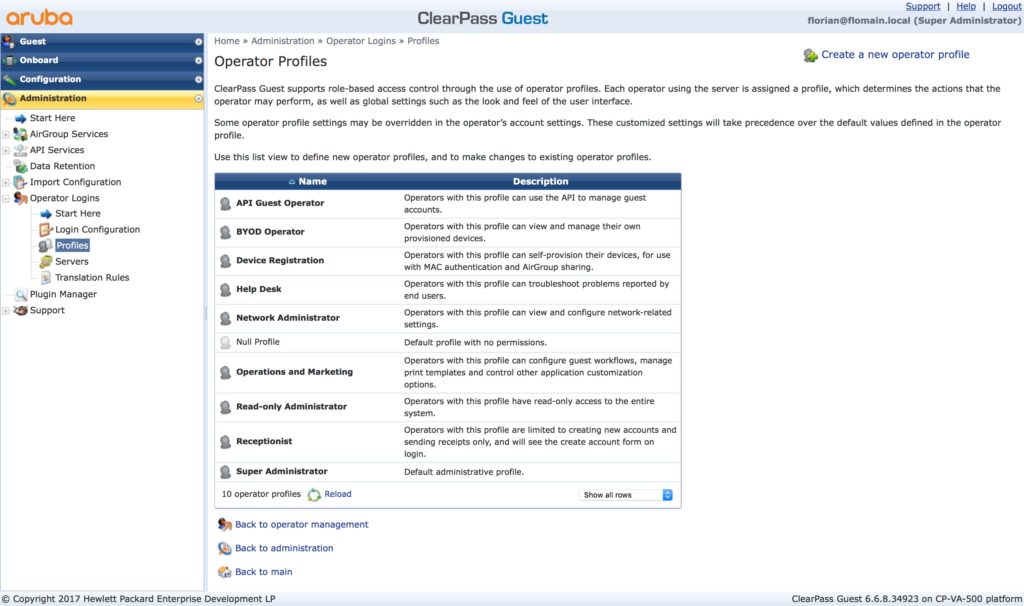
Have a look at the existing ones and use them as possible. Or create a new one. I use the existing ones, “Super Administrator” and “BYOD Operator”.
ClearPass Guest Operator Login – Add ClearPass Roles
To make the management easy. I create roles in ClearPass, with the same name as the profiles from above. Login to ClearPass Policy Server and go to “Configuration–>Identity–>Roles” and click the “Add” button the right upper corner:
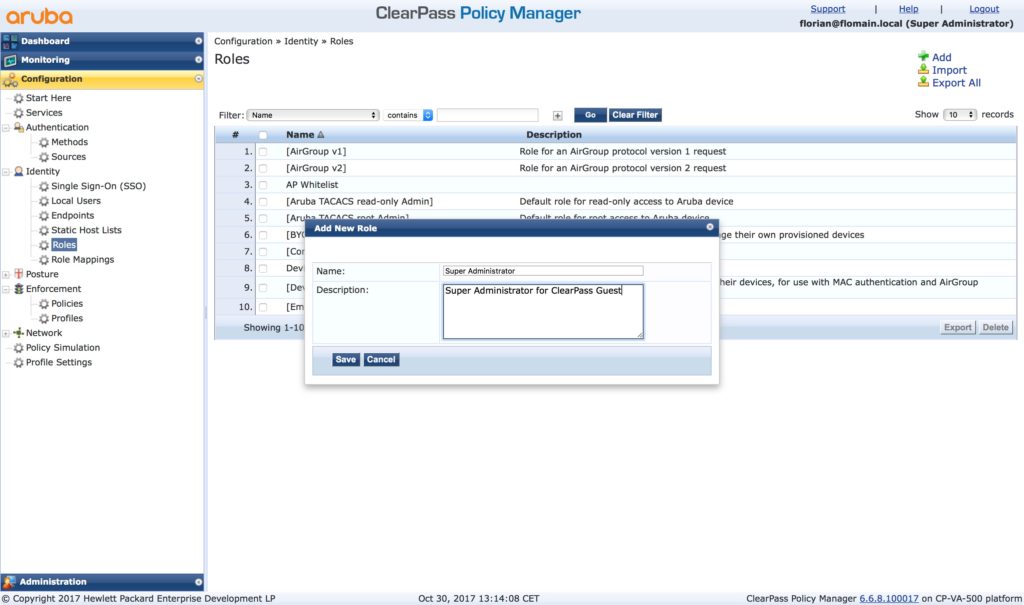
The name has to be unique. Also, create a meaningful description and do this for all ClearPass Guest operator profiles you use.
Now, create a role mapping to use the roles in the authentication process. Go to “Configuration–>Identity–>Role Mapping”. Either us an existing role mapping or create a new one. I use my existing one:
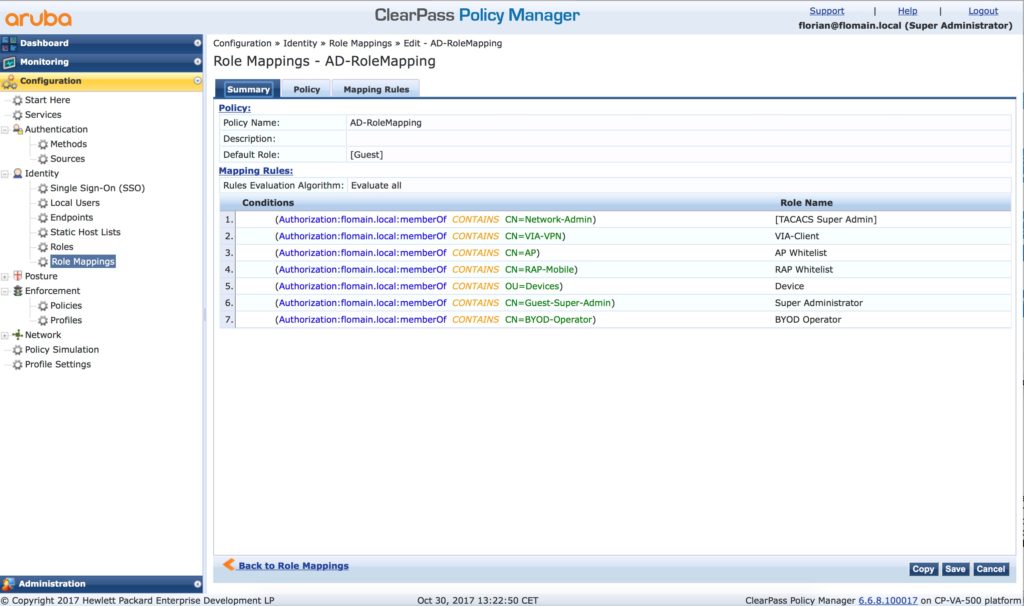
Rule 6 and 7 are new. So every user in Active Directory, which is a member of the group “Guest-Super-Admin” get the “Super Administrator” role. I evaluate all rules, so a user can have multiple roles. keep this in mind. This is important for the policy, later on.
ClearPass Guest Operator Login – ClearPass Enforcement
Now we are getting to the good stuff. I will reuse as much as possible and keep the current operator login process a life. First of all, I create the new enforcement profiles. Login to the ClearPass Policy Manager and go to “Configuration–>Enforcement–>Profile” and create a new application enforcement profile:
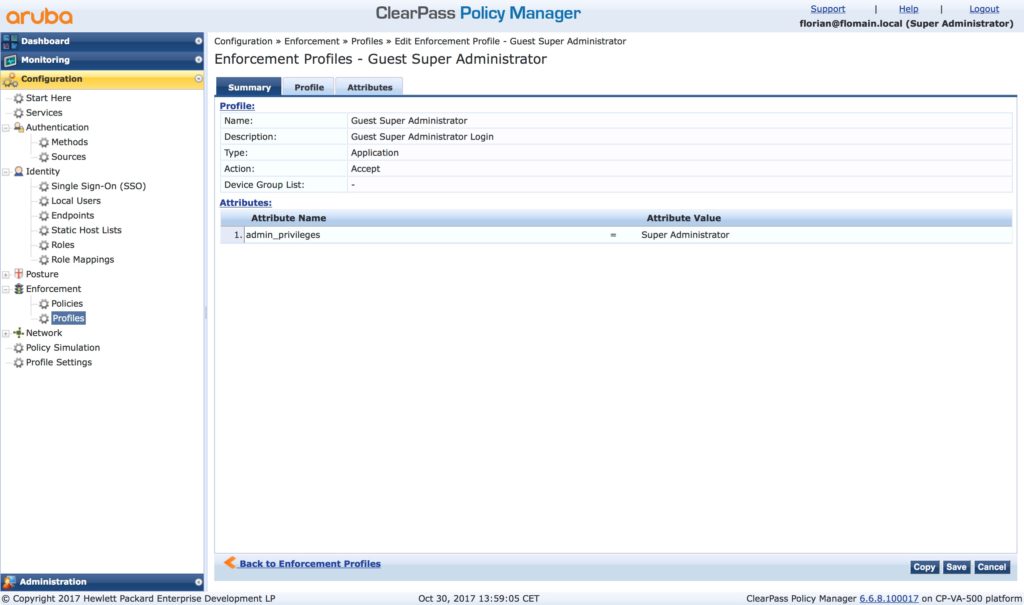
The above is a “Generic Application Profile”. The interesting part is the attribute part. The “Attribute Name” should be “admin_privileges” and the “Attribute Value” the name of the ClearPass Guest operator profile name. Do this for all ClearPass Guest operator profiles you have.
Now, head over to the enforcement policies. I will copy the existing policy. Search for the “[Guest Operator Logins]” policy and make a copy. Select the policy and hit the “Copy” button in the lower right corner and modify the policy to your needs:
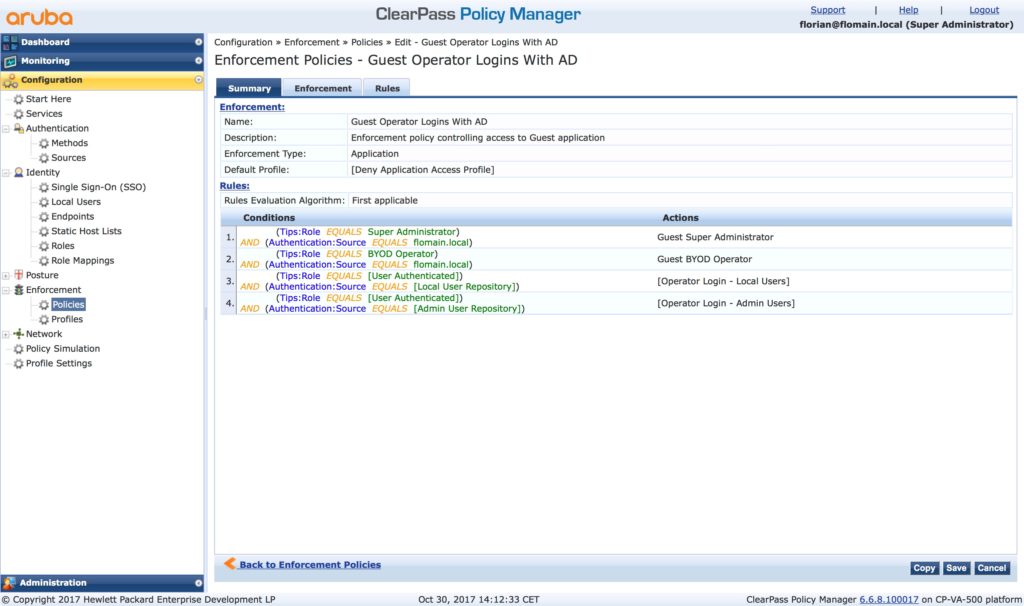
Use a meaningful name and add conditions for all the enforcement profiles you have created before. I have also moved them up to the top. I include the existing conditions as well. This makes sure, you can log in with the internal admin account.
You need to add as many conditions as enforcement profiles you have. As the policy use the first match condition, start with the ClearPass Guest operator profile, with the most privileges and go down to the one with the least privileges.
ClearPass Guest Operator Login – Authentication Service
The last step is to create the authentication service. We cannot use the existing one, as it is not possible to modify this one. As before, just create a copy of the service and work with the copy. The service to copy is “[Guest Operator Logins]”. Below is the summary of my modified service:
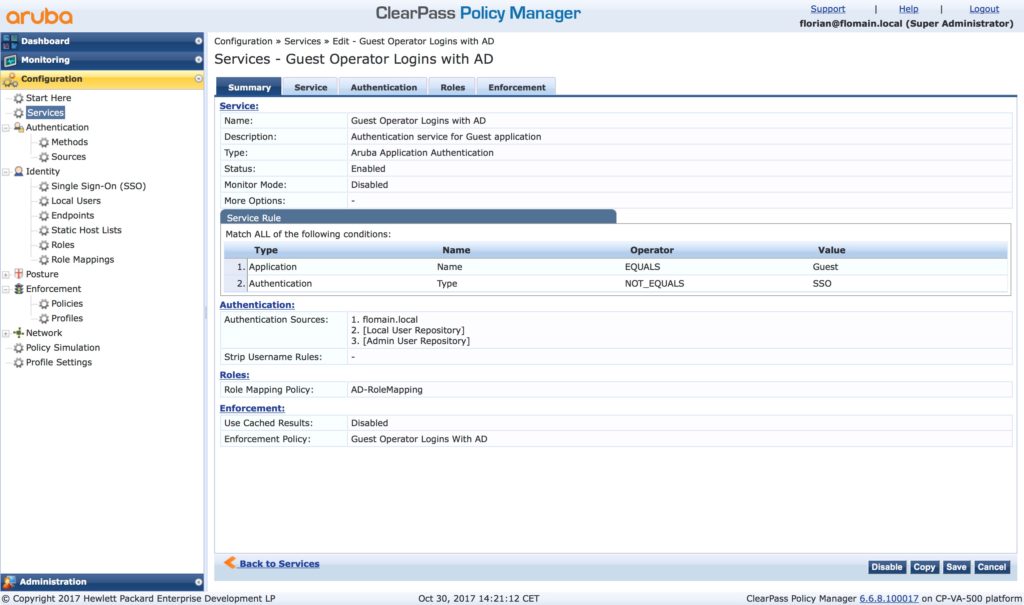
I use my AD as an additional “Authentication Source”. I also use the “Role Mapping” from before and the “Enforcement Policy”. Altogether makes a new service. Now, you need to move the new service before the old one in the list with the “Reorder” button. I put it in position 2. You can now check if it is working. Logout from ClearPass and login to ClearPass Guest with the AD credentials.
The final step is to disable the old default service. Just click the green sign at the end of the row of the list of services. It turns red. Now the old service is disabled. Test if the build in account still works. Just to be prepared for the moment when the AD guy kills the AD.
If you find this post interesting, leave me a comment and share it with your friends. If you don’t like the post, leave me a comment and share it with your enemy. But whatever you do, leave me a comment, now.
Hi Florian, very helpful document.
Hi Joerg,
thanks for the feedback.
See you at the next customer meeting.
BR
Florian