Aruba Instant is a very simple and easy to use WLAN solution. In some projects, I have the situation, that users are placed in VLAN 1. Which is easy with Aruba Instant. But unfortunately, VLAN 1 is the default management VLAN and the AP itself should not be placed in VLAN 1. This was impossible in the past but is very easy now. You can change the management VLAN for Aruba Instant and you can use VLAN 1 for your users.
Change the Management VLAN: Untagged on the Uplink
In the past, you configured the management IP for the Instant AP. This IP was always in VLAN 1 untagged. This is fine when you do not need VLAN 1 for clients. If you do, you need to have the management IP in a different VLAN. This is possible in Instant for some time now. I did this test with the latest and greatest version available. But the feature is included in Instant since version 4.3.0.
The first step is to change the uplink VLAN. The IAP consider VLAN 1 as the native (untagged) VLAN for the uplink. To change this, log into the IAP and go to “System”:

I changed the “Uplink switch native VLAN” to 10. VLAN 10 is my management VLAN in this scenario. And with the default settings, you are done so far, as the IAP assume the management VLAN untagged with default settings.
From Wireshark, you can see that the “Virtual Controller IP” is untagged on the uplink:
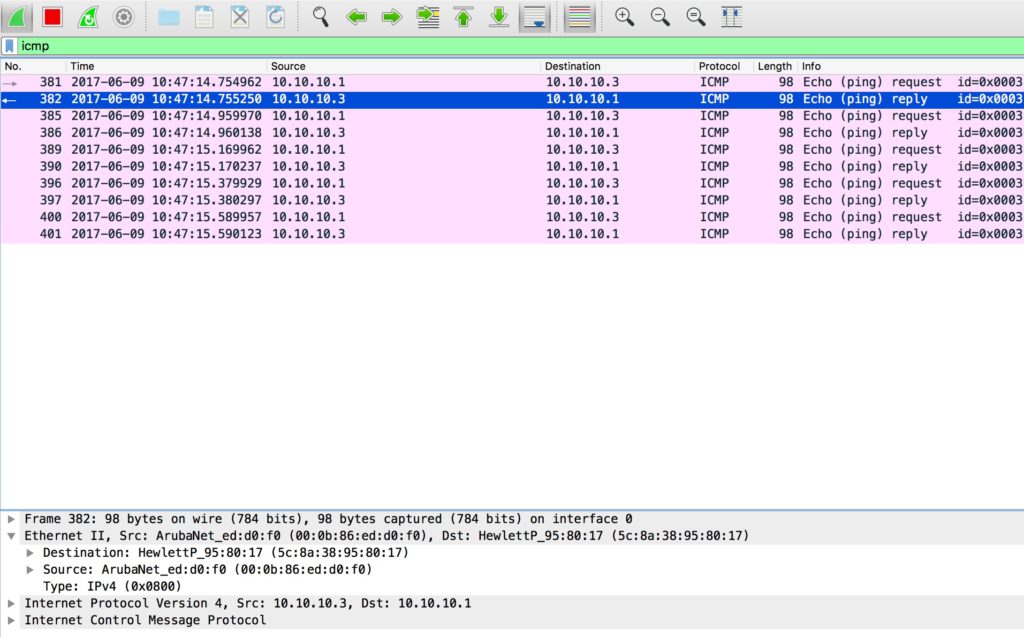
I’m doing a ping from the switch to the controller. No VLAN tags at all.
Change the Management VLAN: Tagged on the Uplink
Now, let’s assume, you need the management VLAN tagged on the uplink. This is possible as well. In the scenario above, I have used VLAN 10 for the management and put this untagged on the uplink. This time, I use VLAN 100 for the management. VLAN 10 is still untagged on the uplink.
To change the management VLAN to VLAN 100 and get the VLAN tagged on the port log into the IAP and select one of the IAP’s in the cluster. Click the “Edit” link and select the “Uplink” for the IAP:
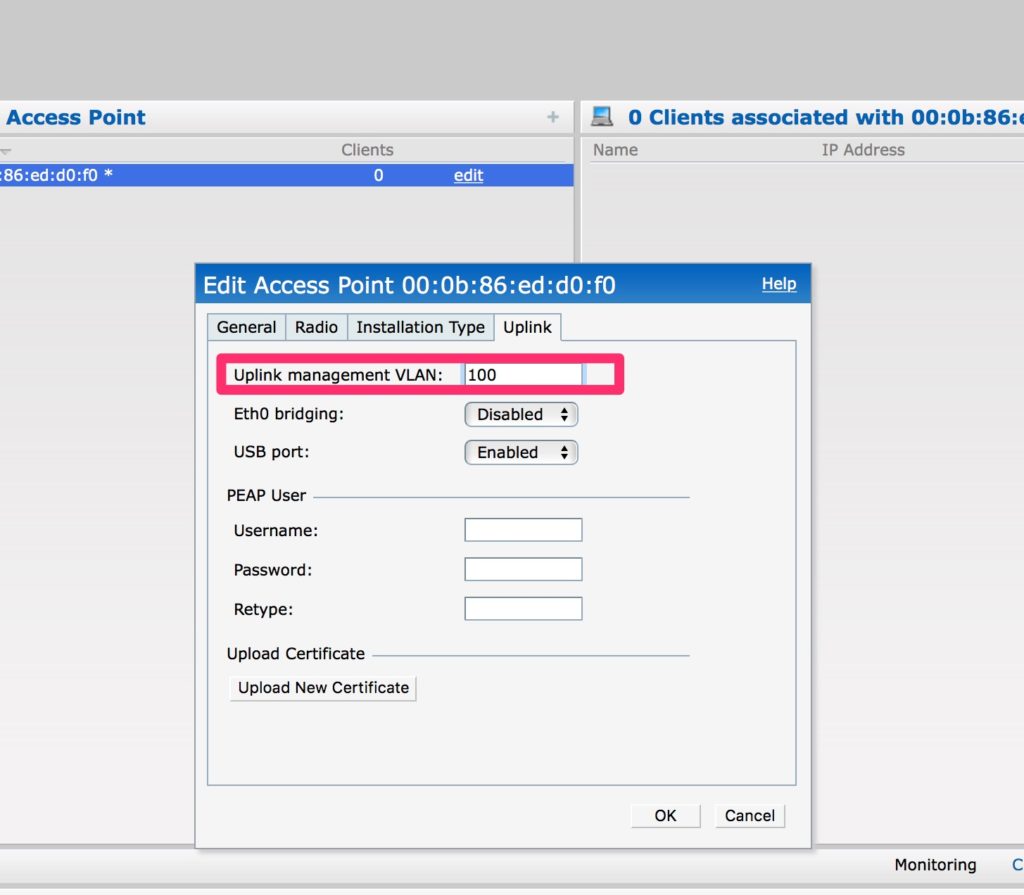
You can define the management VLAN with the “Uplink management VLAN” setting. If this setting is different to the “Uplink switch native VLAN”, the management VLAN is tagged on the uplink. In my case, it is VLAN 100. After adopting the switch configuration you can see the use of VLAN 100:
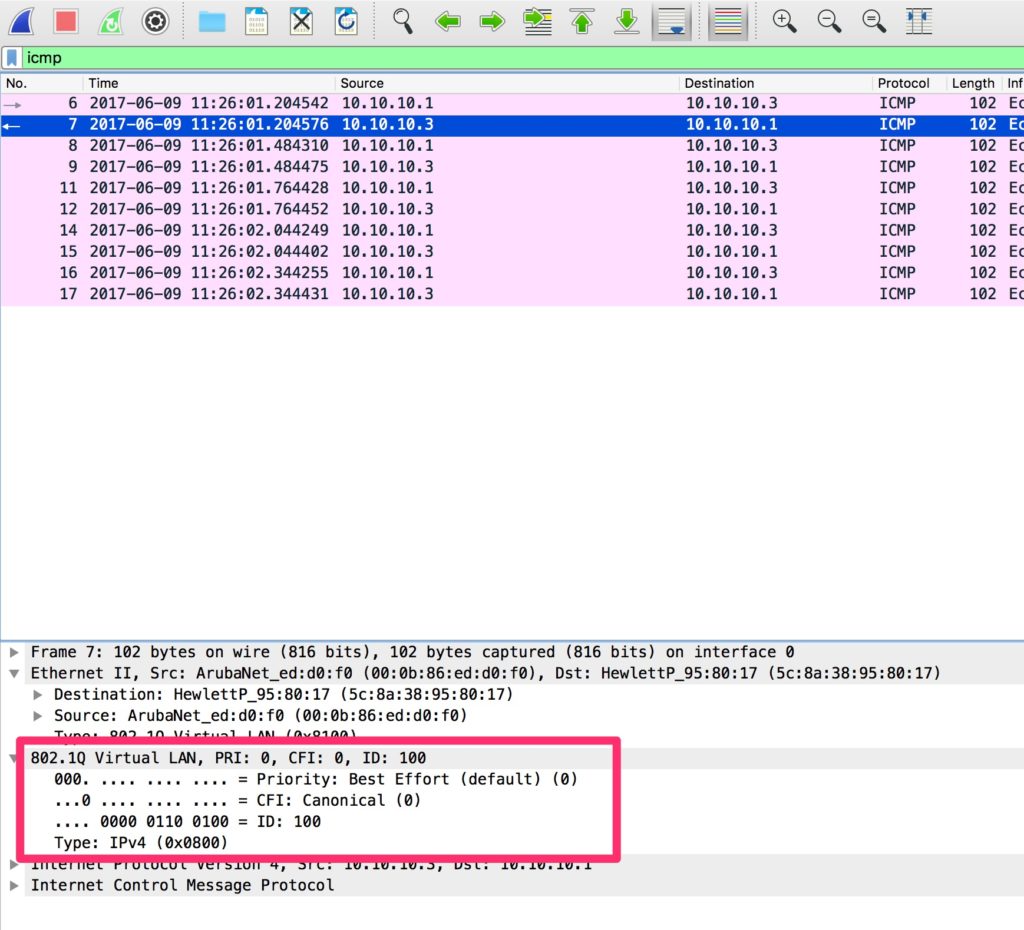
As you can see from the screen above, the ping from the switch to the IAP is now tagged in VLAN 100.
Let’s recap where we are so far. The IAP use VLAN 10 native on uplink and VLAN 100 tagged on the uplink for management. VLAN 1 is not used at all. Which is always my recommendation. But for a complete picture, I use VLAN 1 as an egress network for an SSID. I do the same for VLAN 10. Just to make sure, it is still untagged.
VLAN 1:
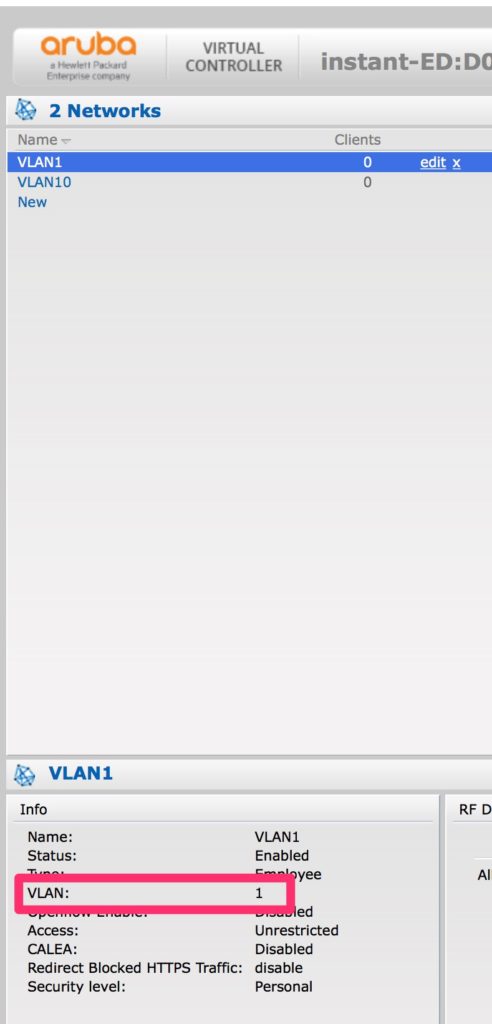
If a client connects to this SSID, the traffic is tagged with VLAN 1 on the Uplink:
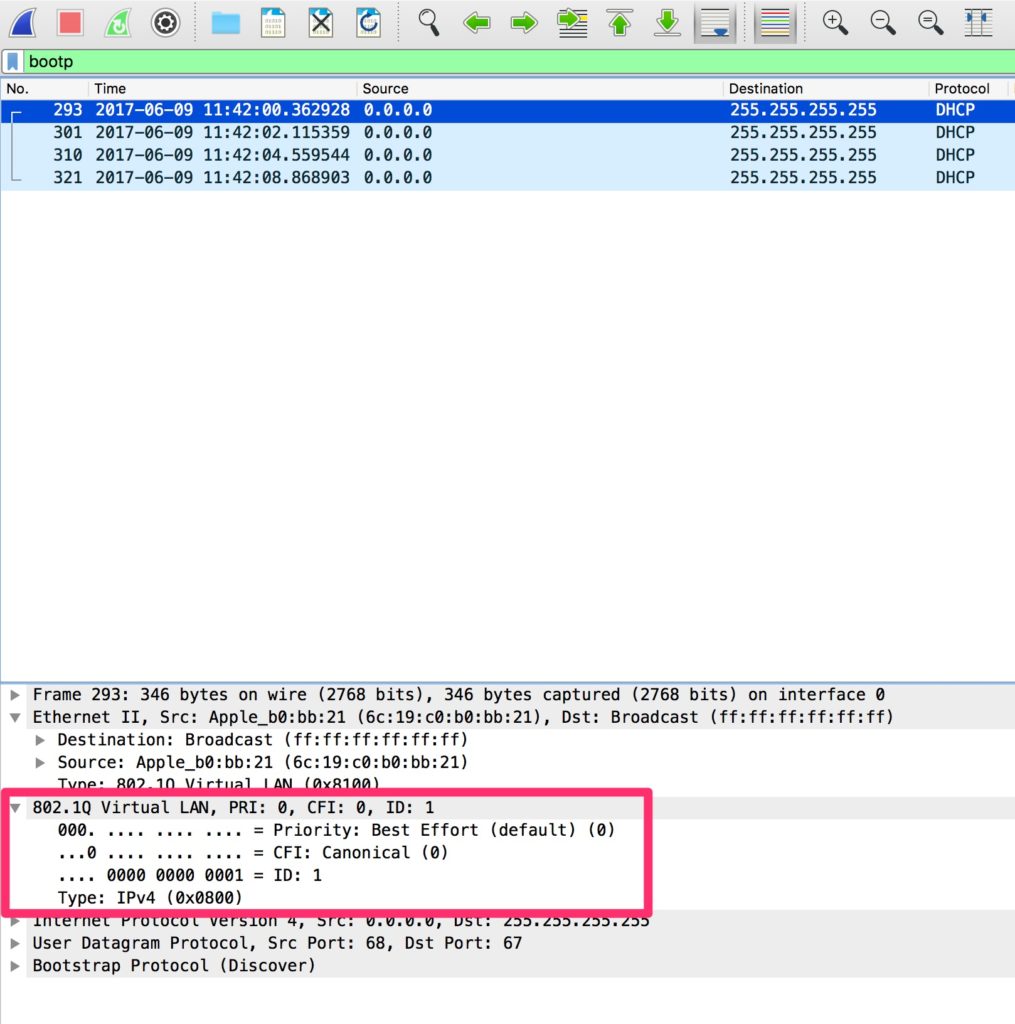
As you can see, the DHCP request is tagged with VLAN 1.
And the same for VLAN 10:
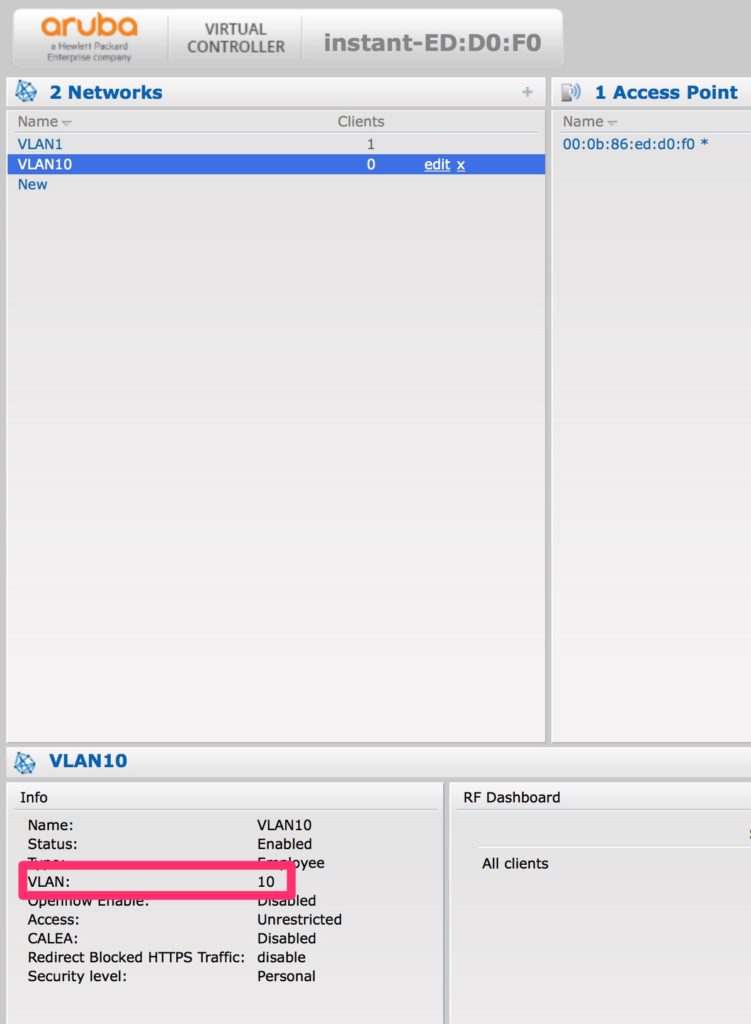
And the Wireshark trace:
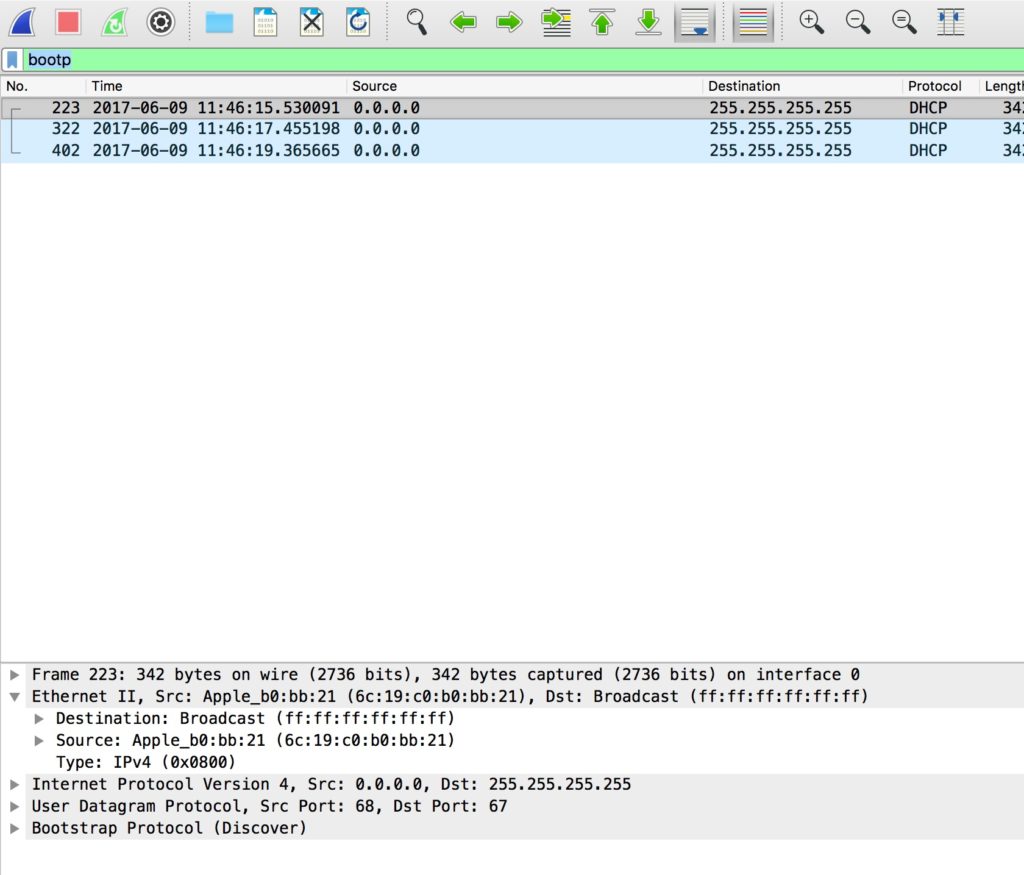
No VLAN tag for the DHCP request. This is the expected behavior as VLAN 10 is the native (untagged) VLAN on the uplink.
From the post above you see that it is very simple to change the management VLAN for the IAP and change the untagged VLAN to a different VLAN than VLAN 1. Do you use VLAN 1 in your environment? Please let me know why or why not. Other questions or feedback is highly appreciated as a comment below.