This time is all about radius based operator login, as some devices might not support TACACS+. The post describes the operator login with radius authentication and command authorization.
This post covers only the ArubaOS devices which do not support TACACS+ command authorization.
Operator Login with Radius on ArubaOS Switches
For those ArubaOS switches, which do not support TACACS+ command authorization there is the option to authorize commands with radius. The radius server sends a list of commands which are allowed or not allowed. The is send during the initial authentication. The following part describes the switch part of the setup.
The first step is to enable radius authentication for ssh, telnet, console and/or web access. In my example, I use ssh.
First, enable authentication for ssh:
aaa authentication ssh login peap-mschapv2Afterward, enable authentication for the enable mode:
aaa authentication ssh enable peap-mschapv2As you see above, for both authentication mechanisms I chose “peap-mschapv2” as this encrypts the password during the transaction. This makes the authentication more secure.
To further enhance the login process, enable direct login to the enable mode:
aaa authentication login privilege-modeThe last step is to enable command authorization:
aaa authorization commands radiusNow, any user, connecting to the switch using ssh is forced to authenticate. Before the authentication can work you need to specify the radius server:
radius-server host 192.168.2.24 key "comcomcom"Save the configuration and head over to ClearPass.
Operator Login with Radius: The ClearPass Part
The configuration in ClearPass is straight forward. And furthermore, ClearPass has the vendor specific attributes already included. No need to create them manually.
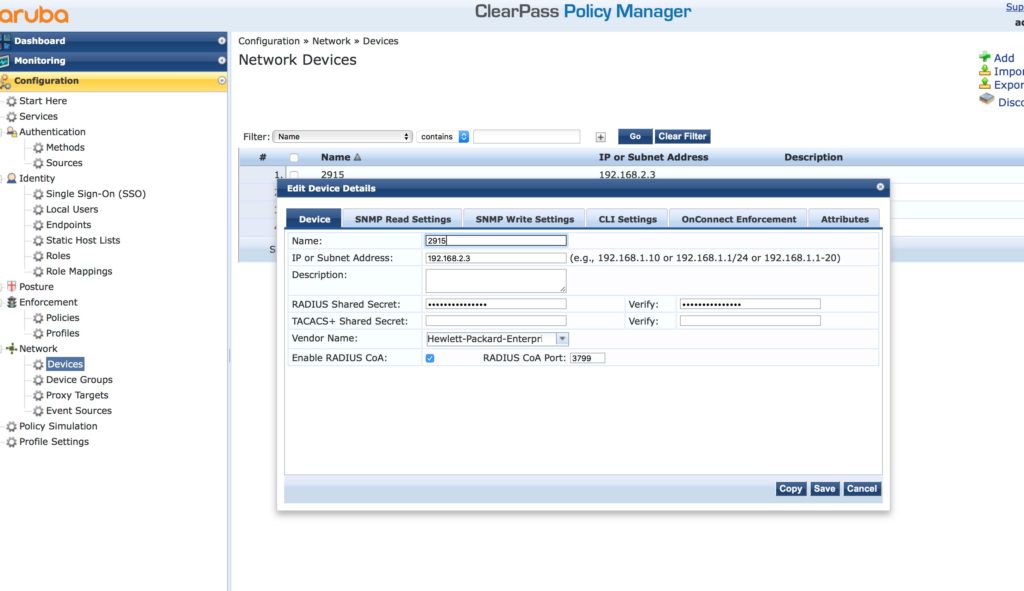
The first step is to create the access device within ClearPass and do so by going to “Configuration–>Network–>Devices” and click the “Add” button:
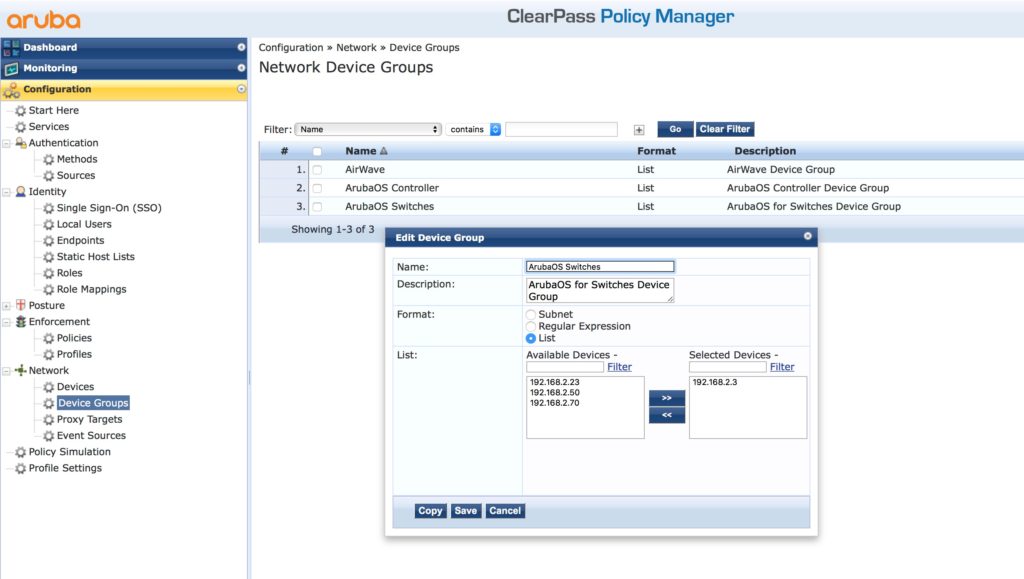
As I feel it is good practice, create the device group as well and add the ArubaOS switches to that group:
Now, we are getting to the interesting stuff and add a profile. Go to “Configuration–>Enforcement–>Profiles” and add a new profile:
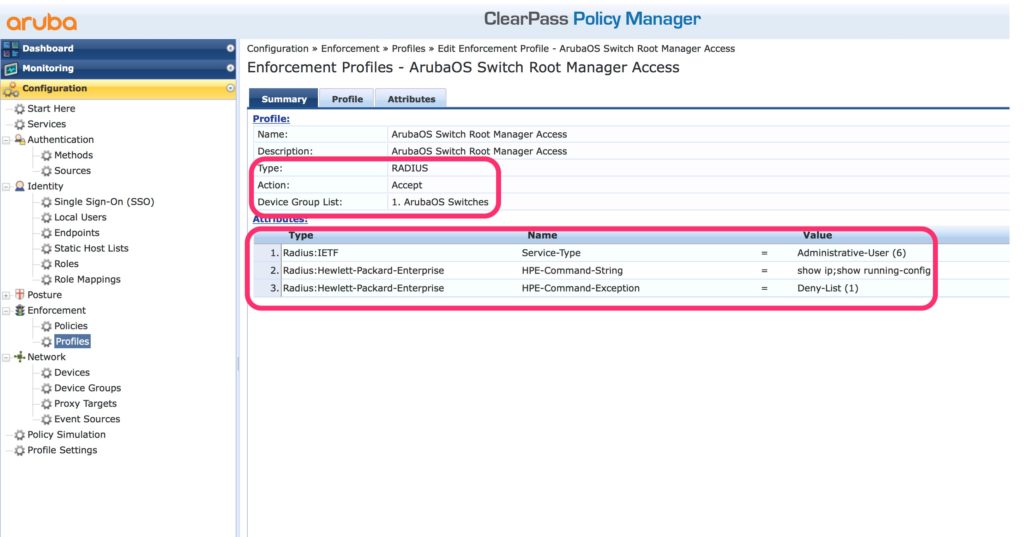
The above is the summary screen. If you create a new one, select “Aruba Radius Enforcement” and click through the wizard. The main and important options are highlighted above. The action is “Accept” and the profile is assigned to the ArubaOS device group. Three Attributes are needed to allow the login. The first defines the operator level. A value of “6” or “Administrative-User” defines the “manager” level. To define the “operator” level use a value of “7” or “NAS-Prompt-User”. Any other value leads to a failed authentication, as the switch will reject the request.
The second attribute contains a list of commands. They are separated by “;”. The value can have up to 255 characters. If those are not enough, you can have the attributes multiple times. You can use regular expressions as well.
And last but not least, the third attribute. This one defines whether the list from the second attribute defines the allow or deny list.
You only need the last two when you configure command authorization. You do not need them if you only use authentication.
Afterward, add the policy to assign different profiles to the different operator:
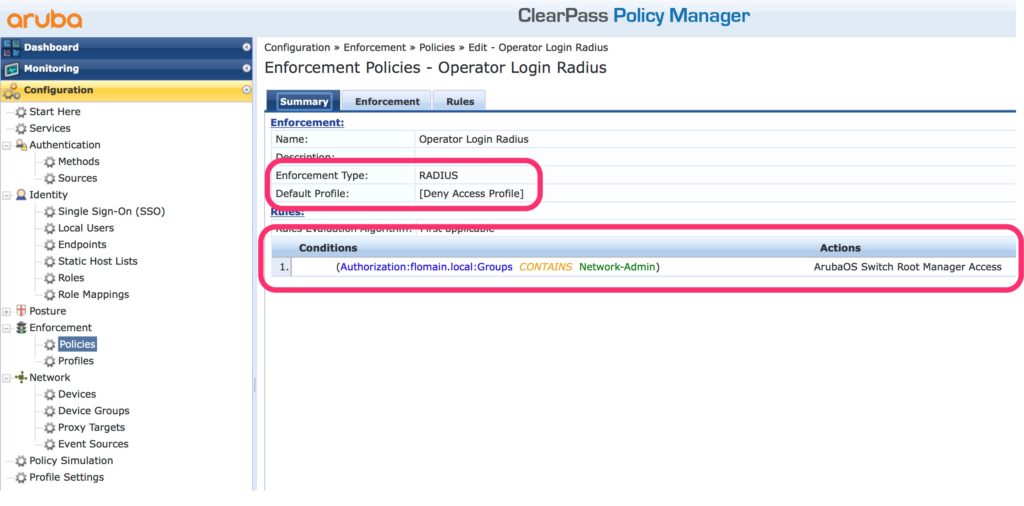
Because I show only the example, I have only one condition. But it makes sense to assign different profiles with different command sets to different operators in your environment.
The most important part is the “Enforcement Type” which is “RADIUS” and the “Default Profile” which should be a deny profile, to make sure that no one can access the device if no condition gets true.
Finally, create the service for the authentication:
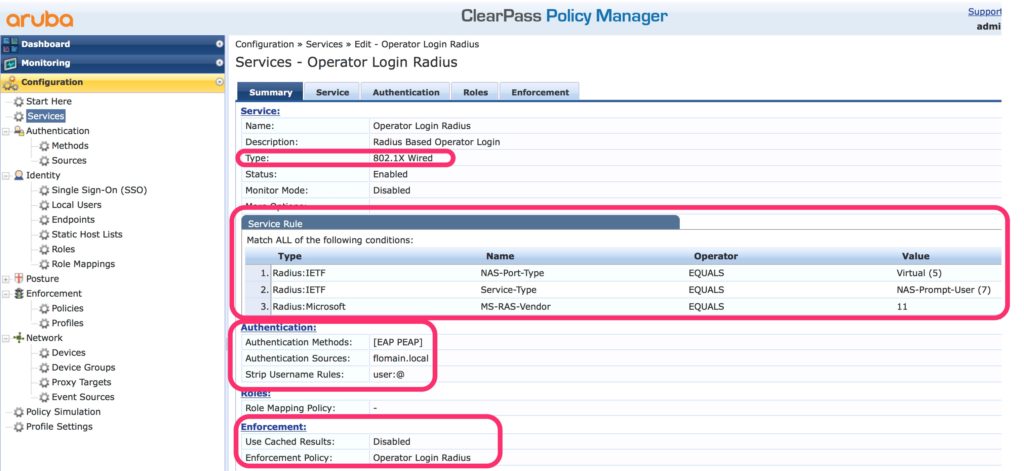
The type of the service is “802.1x Wired” and the service rules look like those above in the picture. This makes sure, that you do not interfere with other authentication services.
The authentication is “EAP PEAP” and I have created a rule to remove the “@domain.tld” from the request, as this is not present in the Active Directory.
The last step is to assign the created policy to the service. Now, you have to test your service to see it in action.
I’m done now with authentication for operators. My next post will be something different, but feel free to write me your opinion below as a comment. I appreciate any discussion about the topic.