In this post, I will show, how to configure and schedule Proxmox live backup to get a full backup of your VM without downtime. I use this for my server once a week and save the created backup to an external backup device.
Configure Proxmox Live Backup
The P
To configure proxmox live backup, login to your proxmox host and head over to backup:

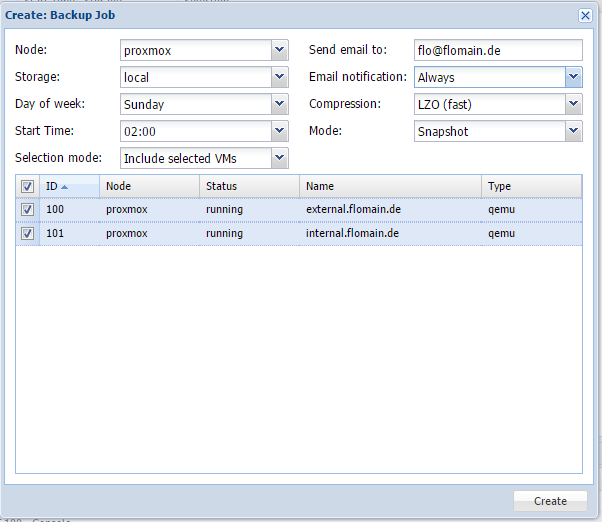
Press “Add” to create a new backup job:

You can run the job on all or a specific node. As I have only one node, I only run the job on this one. You also have to select a storage. You can either create a new one, or use the default one and enable this one to be used as a backup storage as well. I chose the last one. You should select the appropriate timing for the backup. I will run it in the night to reduce the performance impact. I included all available VM’s and send a mail to my mail account every time, the job is running.
You have to select “snapshot” as the mode, as only this mode will allow online backups. All other modes will pause or shutdown the vm.
Clicking create will create the job and the job will run as scheduled.
Restore Proxmox Live Backup
To restore a P

Select the backup you wish to restore and hit “restore”. The process will take a while and afterwards the VM will be in the stopped state and can be started.
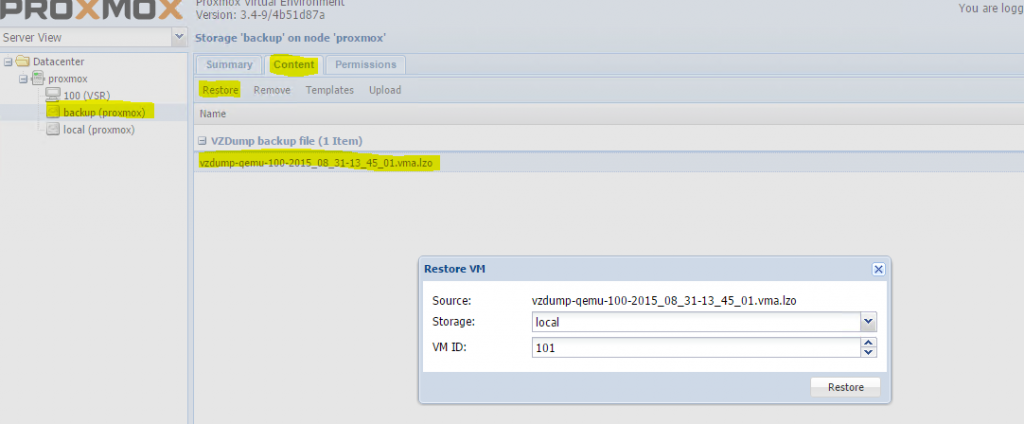
The second option is to deploy the backup to a new server. You have to create a storage which can contain backups on the new server, upload the backup file and then go to this storage:

Select the uploaded backup file and click restore. This will create a new VM using the backup file. After the restore process is finished you should check the network configuration and start the VM.
If you have any questions, regarding this post or if you would like provide feedback, please use the comment function below.