This post will describe how to enable SSH and rsync on a Synology DS. This will allow you to use your DS as a backup server. For this post, I use the Synology DS412+ with the latest version of DSM 5.1-5004.
Enable SSH and Rsync
Before I start, I would like to explain the environment, in which I use the Synology DS as my backup server. I have a Linux server running at an ISP’s datacenter. As I would like to have my backup in a separate location, than my server I had two options. Get another server from another ISP or use my DS at home. As I have enough bandwidth available, I decided to go with this option.
As my DS is at home, the DS is behind my firewall at home and I will not open the rsync or SSH port to reach my DS from the internet. This means, I need to find another way to get it working. My first idea was about using OpenVPN, but this doesn’t worked for me. My second idea was around SSH reverse tunneling and this got me to the finish line.
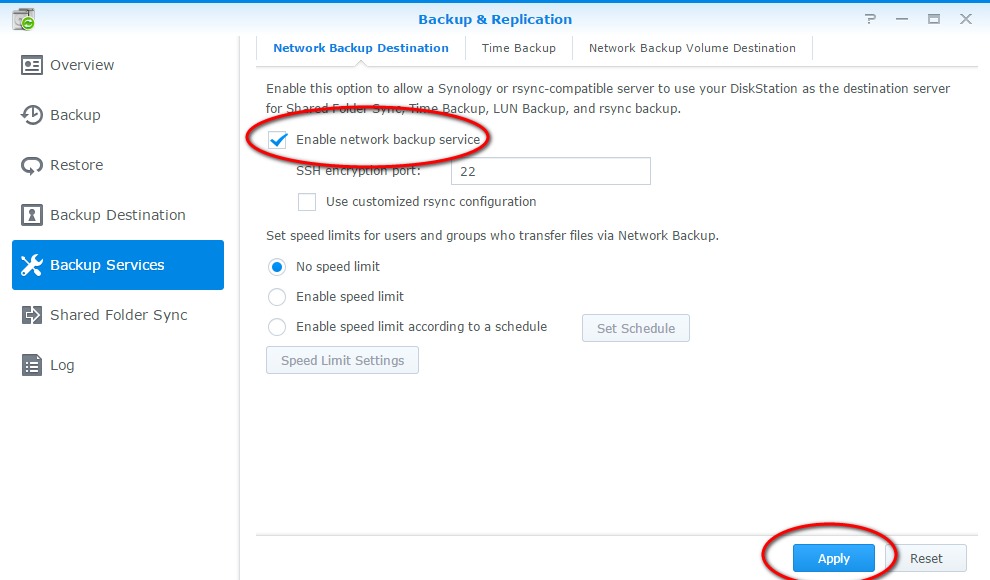
To start using the DS as a backup server, you need to enable SSH and rsync on the DS. By opening the “Backup & Replication” dialog and go to “Backup Services” you can enable rsync:

Check the check mark for “Enable network backup service” and click “Apply”. You are now able to use rsync within your network. As my DS is behind a firewall, there are more steps for getting it working.
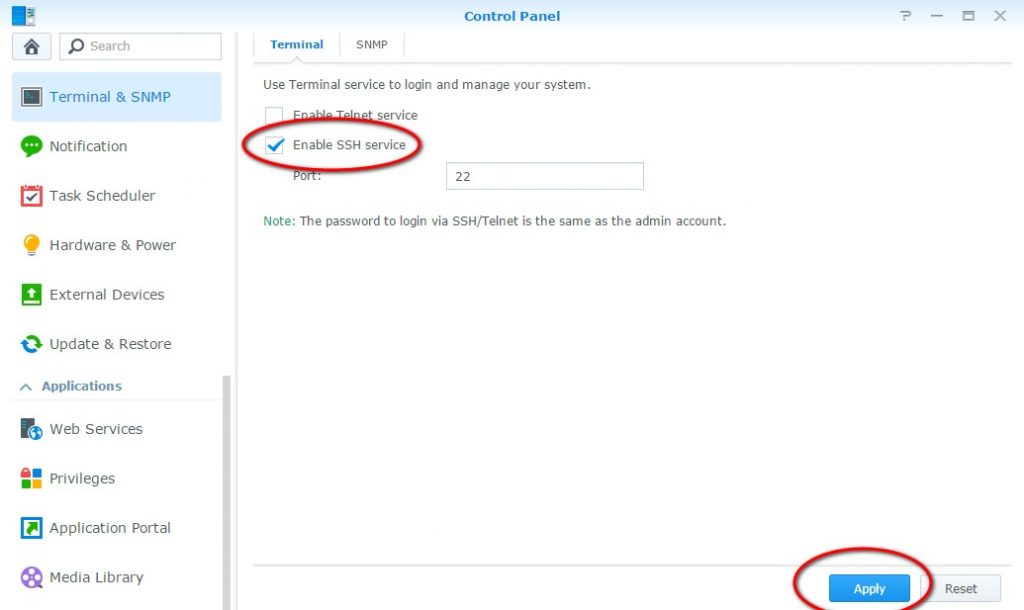
Now, I need to enable SSH. Go to control panel and select “Terminal & SNMP”:

Enable SSH by checking the check mark for “Enable SSH service” and click “Apply”. Afterwards you can connect to the DS by SSH using “root” as the user and your admin password as the password.
You can now use SSH to connect to the DS and use rsync to backup your files. In my case, this will not work, as my DS is behind my firewall and SSH is not allowed, but there is a solution. I use the SSH reverse tunnel feature to create a connection from my DS to my server and then run a script. I will explain those steps in a later post.
For any feedback or questions, please use the comment function.